15. Batch Processing  
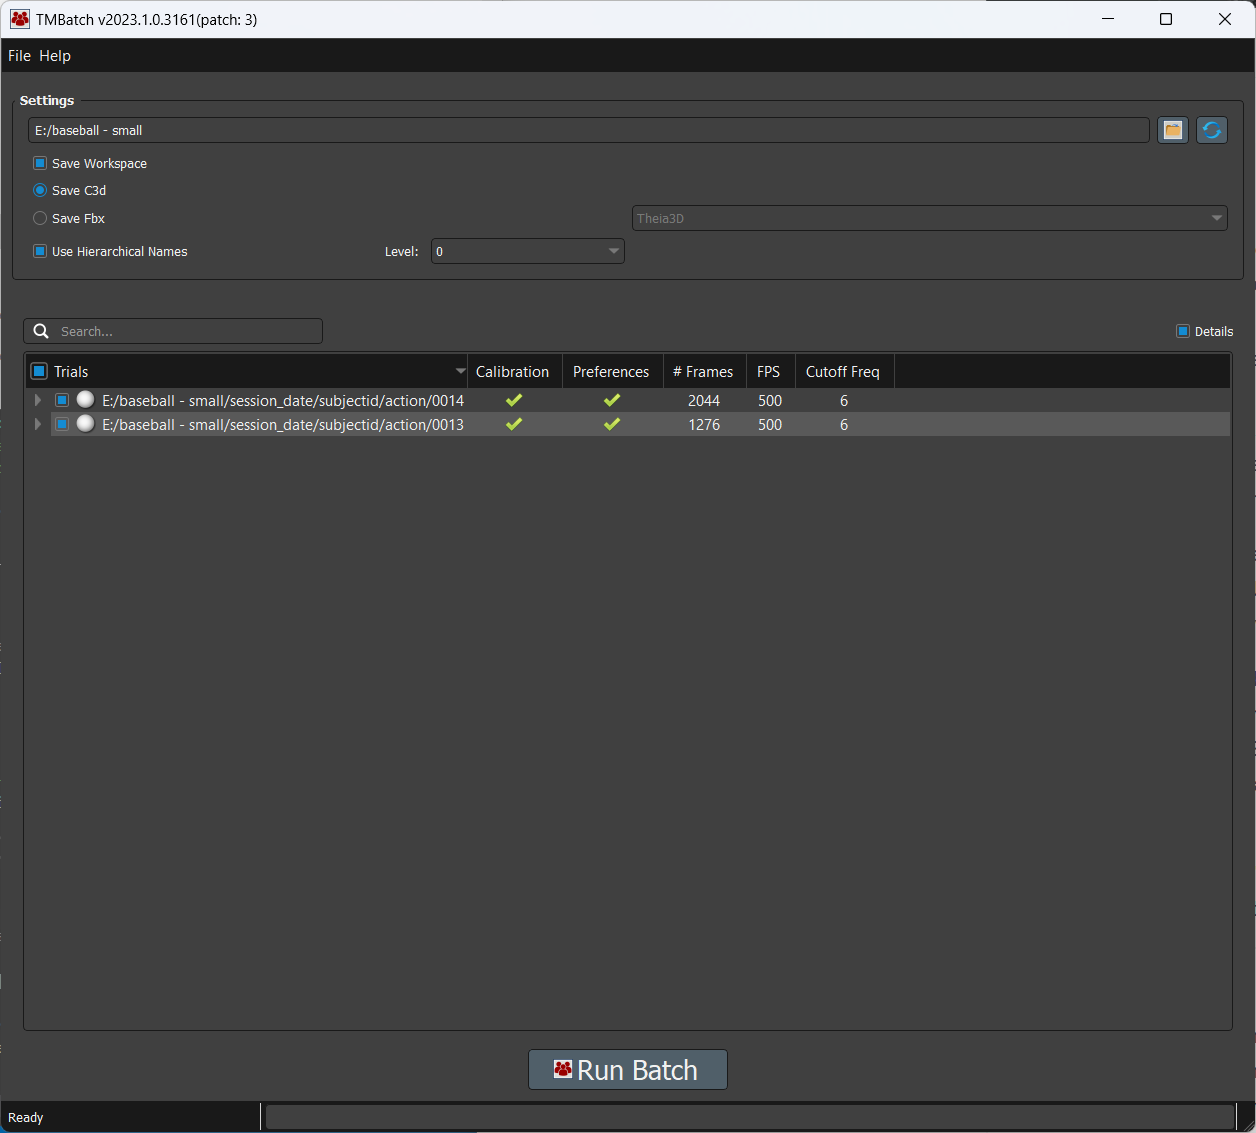
The TMBatch program.
One of the benefits offered by Theia3D markerless motion capture is automated tracking, which allows it to analyze large datasets without human intervention or supervision. This is achieved using the TMBatch companion application to Theia3D, which allows a list of trials to be curated and batch analyzed sequentially. While batch processing is efficient and does not require supervision, we always recommend that you manually examine and check the quality of your markerless data and calibrations using Theia3D, before setting up a batch analysis. This can prevent poor calibrations or other issues with the data from going unnoticed until after the batch analysis has been completed.
There are a variety of tools available within TMBatch to organize and analyze multiple trials. The data to be processed must be in a single directory that can contain as many levels of subdirectories as desired to organize the data. However, each branch of the directory must end with a folder containing the data for a single trial. This must be a folder of video data as described in Video Data that also contains the calibration file for the trial. It is critical that the IDs of the cameras in the calibration file are the same as the IDs of the video file subfolders. When using this tool, the first step is to make sure your video data are organized and the calibration has been added to the files. Once these steps are complete, your data is prepared for batch processing. Proceed to Settings and Trials for details on setting up and executing a batch analysis.
15.1. File Menu Reference
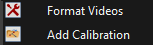
The File menu.
15.1.1. Format Videos  
See Organize Videos
15.1.2. Add Calibration  
15.2. Help Menu Reference
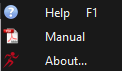
The Help menu.
15.2.1. Help  
Opens the online documentation for the software.
15.2.2. Manual  
Opens the pdf documentation to the software.
15.2.3. About  
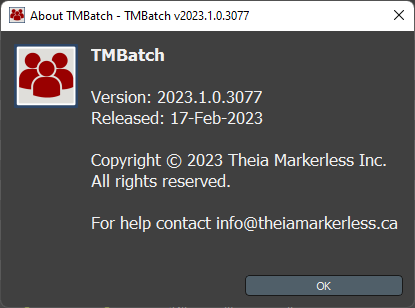
The Info dialog shows the software version number, release date, and help contact information.
15.3. Settings
The Settings section provides widgets to set up the current batch analysis. The Browse  button enables the user to select the root folder. The data to be processed must be organized in this single root folder that can contain as many levels of subdirectories as desired to organize the data. However, each branch of the directory must end with a folder containing the data for a single trial. This must be a folder of video data as described in Video Data that also contains the calibration files for the cameras. It is critical that the IDs of the cameras in the calibration file are the same as the IDs of the video file subfolders. The Settings section enables the user to input the batch analysis root directory and the output format that will be generated by the batch analysis:
Batch Path: Currently selected batch analysis root folder.
Browse
: Select the batch analysis root folder.Refresh
 : Refresh the batch analysis root folder to update the Trials list with changes to the folder.
Save Workspace: If selected, a workspace is saved for each trial in a folder called inputdirectory_workspace. This folder is in the same location and has the same structure as inputdirectory.
Save C3d: If selected, the pose .c3d files will be saved for each trial in a folder called inputdirectory_c3d. This folder is in the same location and has the same structure as inputdirectory.
Save Fbx: If selected, the pose .fbx files will be saved for each trial in a folder called inputdirectory_fbx. This folder is in the same location and has the same structure as inputdirectory. The coordinate system convention used in the .fbx file can be selected from the dropdown box.
Use Hierarchical Names: (Only applicable when Save C3d is selected) If selected, the pose .c3d files will be created with file names that combine the folder names from the lowest n levels of the batch analysis folder hierarchy, where n is the selected Level dropdown value. For example, if selected and Level=3 for data that is structured as [subject] / [action] / [trial] / [camID], the output files will be named: [subject]_[action]_[trial]_pose_filt_#.c3d.
Note: The batch analysis may encounter errors if the folder structure, calibration file, or preferences are incorrect. These issues may be identified in the Trials list once the root folder has been selected, however the user is urged to read and understand the requirements for these data structures and files prior to running a batch analysis.
15.4. Trials
The Trials list is populated with all valid trials within the selected batch analysis root folder, once a folder has been selected. The Trials list has the following features within each row, from left to right:
Search: Filters trials via string compare and regular expression. Helps with batching a subset of the root folder.
Details: Show trial meta data like frame rate.
Checkbox: Selection square that indicates whether the trial is included in the batch analysis. Initially, all trials are selected.
Status Indicator: Circle that indicates the status of the trial:
White indicates unknown, or not yet analyzed.
Blue indicates the trial analysis is done.
Green indicates the trial was successfully analyzed.
Cyan indicates the trial analysis was skipped.
Yellow indicates the trial analysis was cancelled.
Red indicates the trial analysis failed.
Trial Path: The full path to the trial.
Calibration Indicator: Icon that indicates the status of the calibration file for the trial:
 indicates a valid structure and calibration file.
 indicates more than one calibration file was found.
 indicates the trial does not have a calibration file.
Preferences Indicator: Icon that indicates the status of the preferences file for the trial.
 indicates the default preferences will be used to analyze the trial.
- indicates a valid structure and preferences file that is not the default preferences file will be used to analyze the trial.
- indicates more than one preferences file was found.
# Frames: Length of the trial, expressed as the number of frames.
FPS: Video frame rate of the trial, expressed as Frames Per Second (FPS).
Cutoff Freq: GCVSPL Cutoff Frequency that will be used to analyze the trial as selected in the preference file for the trial, expressed in Hz. See details below for how to edit the preferences file to change the Cutoff Freq.
At the bottom of the TMBatch window, the Run Batch button is used to start the batch analysis. After clicking Run Batch, the TMBatch performs a check to identify trials that have already been analyzed. If it finds any, a dialog is shown offering the user to skip or re-run these trials. This allows data to be added to a directory and that directory to be batch processed again without reprocessing completed trials. Once the batch has started, Theia3D will run in the background a full analysis on each checked trial in the list. After the batch has finished, the results of each trial can be viewed in Theia3D by loading the saved workspace belonging to this trial.
Modifying the Trials List
The Trials list can be easily modified using to include or exclude groups of trials to allow portions of the trial list to be left out of the batch analysis. This can be useful if you are only interested in analyzing specific portions of your data, for example only analyzing one action. The easiest way to make modifications to the Trials list is using the Search bar above the Trials list in combination with the selection box next at the top of the Trials list, which selects or deselects all currently displayed trials. This can be performed to exclude specific subsets of trials, or include specific subsets of trials from the batch analysis.
An example procedure for using this technique for modifying the Trials list is as follows:
Ensure all trials are currently selected using the ‘select/deselect all’ box at the top of the Trials list.
Use a specific search term in the Search bar to display a subset of trials you wish to exclude.
Confirm the currently displayed trials are those that you wish to exclude.
Use the ‘select/deselect all’ box at the top of the Trials list to deselect these trials.
Clear the Search bar.
Confirm that the subset of trials is now deselected within the complete Trials list.
Note: The list of trials displayed after using the search bar is not the current batch analysis list, but just a list of the trials from within the batch analysis directory that meet the search criteria.
15.5. Preferences
The preferences file associated with each trial determines the prefences used when that trial is analyzed. This allows you to customize the preferences used across different trials within a single batch analysis, providing greater control over the analysis process. If there are not any preferences .pxt files assigned to the trials within your selected batch analysis root folder, the Preferences column will indicate that the default preferences will be used for your trials.
Right-clicking on the preferences column displays a context menu for the preferences, with the following options:
Defaults: Reset the preferences to their default values for the selected trials, or if no trials are selected, for the current trial.
Edit: Opens the Settings dialog to change the preferences for the current trial.
Copy: Copes the preferences of the current trial to the clipboard.
Paste: Pastes the preferences in the clipboard to the selected trials, or if no trials are selected, to the current trial.
Modifying the Preferences
An example procedure for modifying the preferences assigned to a subset of trials is as follows:
Select one of the trials in the subset whose preferences you wish to modify.
Right-click on the Preferences column for that trial, and select Edit.
Modify the preferences in the Settings window to your desired preferences, and click Save.
Right-click on the Preferences column for the same trial, and select Copy.
Select the remaining trials in the subset whose preferences you wish to modify, using ctrl+click to select sequential groups of trials or shift+click to select individual trials.
Right-click on the Preferences column for one of the currently selected trials, and select Paste.