9. Calibration Menu
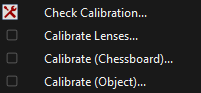
The Calibration menu.
9.1. Check Calibration  
The extrinsic camera calibration can be checked after the trial has been analyzed fully. For each view, the 2D representation of the skeleton in that view is compared to the 3D skeleton computed from all views. If the alignment can be improved in at least 30% of the frames by translating the entire skeleton within the 2D image for that view, this information is reported in the dialog. You can then choose to deactivate the cameras that are out of calibration and clear the entire analysis.
Note: This command looks for consistent translational offsets between the 2D skeleton detected for a given view and the 3D skeleton projected on that view, even if the translations are small (on the scale of millimeters). For trials with relatively minimal motion, this may result in views being detected as out of calibration when they are not. If you think you’ve encountered one of these false positives, try checking a trial with more motion that uses the same calibration file. If the trial with increased motion shows similar translational offsets, then the view is likely out of calibration. If you think that a camera may have been moved inadvertently between trials, you can check the calibration of multiple trials to try to determine when the camera was moved.
9.2. Lens Calibration
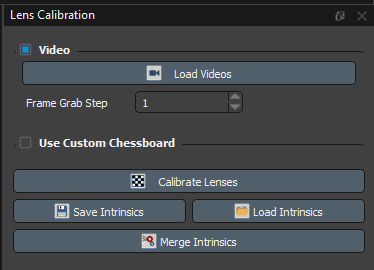
The lens calibration dialog is used to calibrate intrinsic camera parameters such as focal length and distortion.
Intrinsic lens calibration is used to determine parameters associated with the camera lenses and to correct for distortion and other visual effects. Lens calibration is required for OptiTrack Prime Color camera users, and may be required for Qualisys and Vicon camera users who are not using those third parties’ wand calibration procedures.
If your lens calibration trial videos require enhancement to improve the brightness, contrast, or white balance, you can use the Enhance Videos tool. Use the lens calibration Load Videos button, then open and use the Enhance Videos tool to modify your videos.
Load Videos: Load video files (.mp4 or .avi) containing the intrinsic lens calibration trial. To load the videos, browse to and select the folder containing the videos. The structure of this folder must conform to the format described in Video Data. Note that videos loaded using this dialog are rendered in grayscale.
Frame Grab Step: The step between frames searched for chessboards. Smaller values take longer to process, but may provide slightly improved calibration results compared to larger values.
Use Custom Chessboard: Use a custom size chessboard for the calibration. Only select this option if not using the chessboard provided by Theia Markerless.
Square Size: The width and height of each square on the chessboard. Measured in mm.
Number of Squares High: The number of inner squares in the vertical direction of the chessboard.
Number of Squares Wide: The number of inner squares in the horizontal direction of the chessboard.
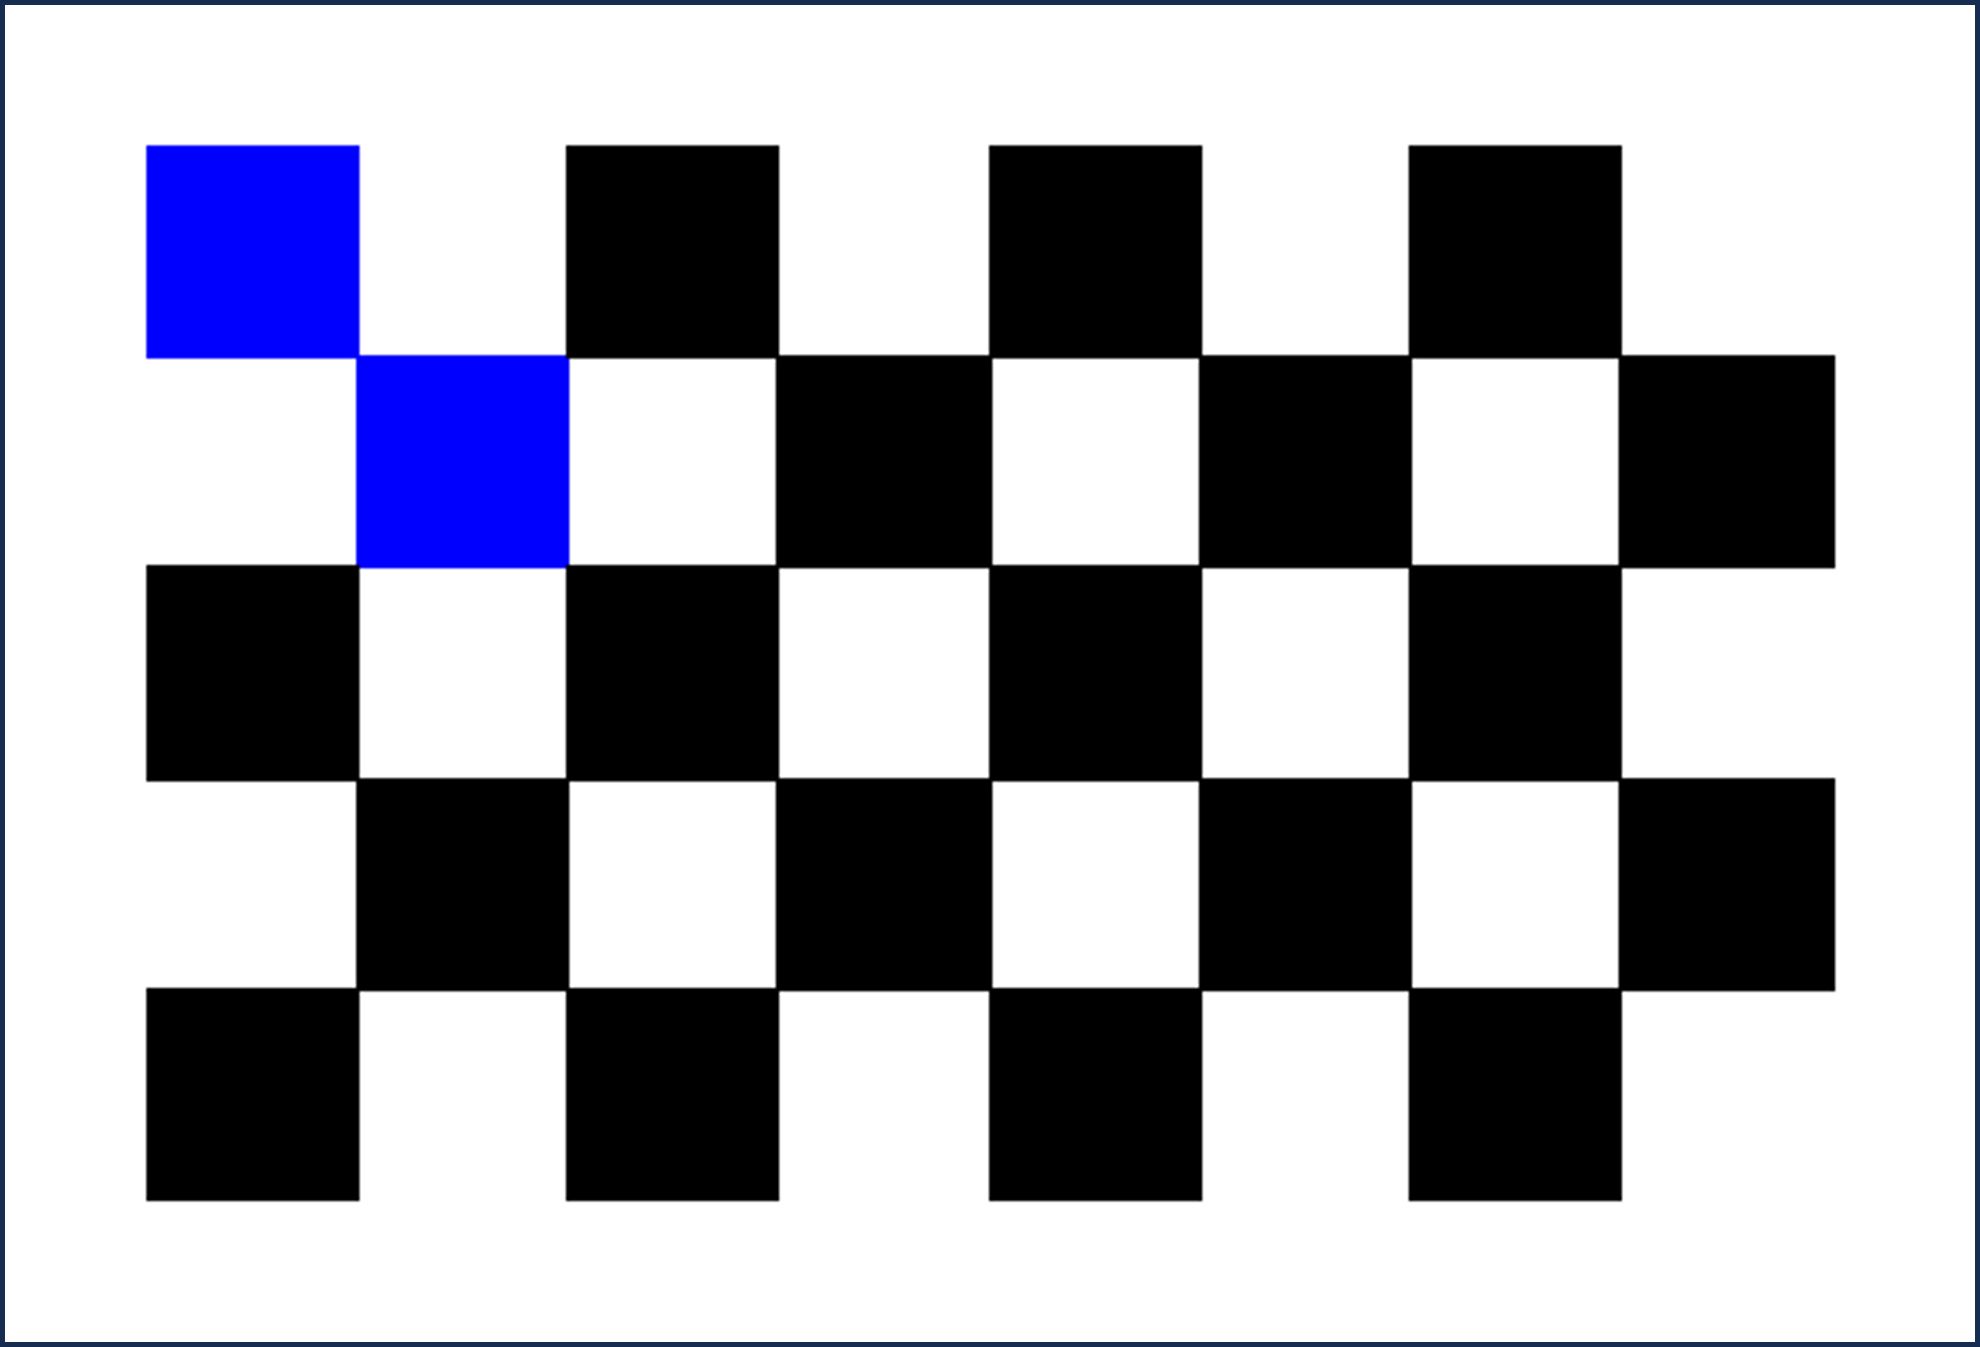
Exemplar intrinsic calibration chessboard.
Calibrate Lenses: Perform the instrinsic calibration for all of the cameras.
Save Intrinsics: Save the intrinsic calibration parameters in a format that can be loaded during future calibrations. This is useful when the intrinsic parameters do not change between calibrations. To save the intrinsic calibration, browse to the desired save location and enter the desired filename.
Load Intrinsics: Load the intrinsic calibration parameters from a previous calibration. This is useful when the intrinsic parameters do not change between calibrations. To load the intrinsic calibration, browse to and select the previously saved intrinsic lens calibration file.
Merge Intrinsics: Merge the intrinsic calibration parameters from the current calibration trial with those from a previous calibration. This is useful when new cameras have been acquired that need to be added to an existing intrinsic calibration file, or if a new intrinsic calibration trial has been recorded for a subset of cameras that are already in an existing intrinsic calibration file and the old camera parameters should be replaced. To add or replace intrinsic parameters for a set of cameras within an existing intrinsic calibration file, load the intrinsic calibration trial for those cameras, select the Frame Grab Step, and click Calibrate Lenses. After the lenses have been calibrated, click Merge Intrinsics, then navigate to and open the existing intrinsic calibration file to which the new parameters should be merged. A new, merged intrinsic calibration file will be saved next to the existing file.
After the lens calibration is complete, a dialog will appear with the results of the intrinsic lens calibration trial.
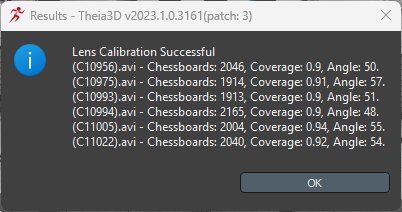
Example intrinsic lens calibration results dialog.
Chessboards: The number of video frames used to calibrate each camera.
Coverage: The proportion (maximum value 1) of the camera view covered during the intrinsic lens calibration trial.
Angle: The maximum angle of the chessboard relative to the camera image plane during the intrinsic lens calibration trial.
9.3. Chessboard Calibration
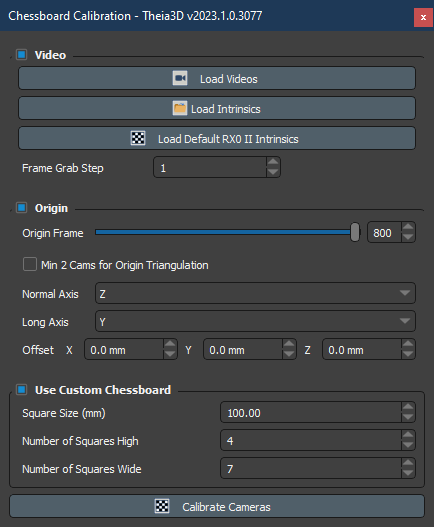
The chessboard calibration dialog is used to calibrate extrinsic camera parameters (camera position and orientation).
Load Videos: Load video files (.mp4 or .avi) containing the chessboard calibration trial. To load the videos, browse to and select the folder containing the videos. The structure of this folder must conform to the format described in Video Data.
Load Intrinsics: Loads intrinsic lens parameters for the videos loaded. Note: Intrinsics depend on the resolution, so be sure you are loading the correct intrinsic file for the resolution of the chessboard calibration trial you are trying to process.
Load Default RX0 II Intrinsics: Load default lens calibration parameters for Sony RX0 II cameras and apply them to all cameras. This can be used to avoid performing a lens calibration when using the RX0 II cameras. Loading default intrinsics overwrites any existing lens calibration parameters. Note: These parameters are only valid for Sony RX0 II cameras with standard lenses. For any other cameras or lenses these default parameters are invalid.
Frame Grab Step: The step between frames searched for chessboards. Smaller values take longer to process, but may provide slightly improved calibration results compared to larger values.
Origin Frame: Frame to use to set the global coordinate system of the capture volume. If the chessboard is not detected in at least three views in this frame, the closest frame in which it can be detected will be used.
Min 2 Cams for Origin Triangulation: Uses two (instead of the default of three) cameras to locate the origin frame. Use this option if the board is difficult to see in the triangulation frame from three cameras.
Normal Axis: Set the coordinate system axis that is defined by the normal axis of the chessboard.
Long Axis: Set the coordinate system axis that is defined by the long axis of the chessboard.
Offset: Adjust the position of the origin. This can be set before or after the calibration is run. (Default: 0 mm)
Use Custom Chessboard: Use a custom size chessboard for the calibration. Only select this option if not using the chessboard provided by Theia.
Square Size: The width and height of each square on the chessboard. Measured in mm.
Number of Squares High: The number of inner squares in the vertical direction of the chessboard.
Number of Squares Wide: The number of inner squares in the horizontal direction of the chessboard.
Calibrate Cameras: Perform the extrinsic calibration for all of the cameras.
Exemplar extrinsic calibration chessboard.
After the camera calibration is complete, a dialog will appear with the results of the chessboard calibration trial.
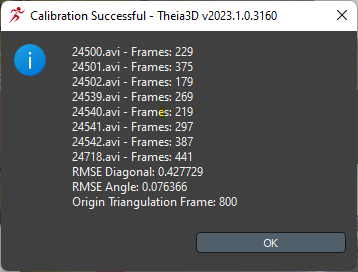
Example extrinsic chessboard calibration results dialog.
The result metrics can be interpreted as follows:
Frames: The number of video frames used to calibrate each camera.
RMSE Diagonal: RMSE error of the length of the diagonals of the 4 outer corners of the chessboard relative to their known lengths, for all triangulated chessboard detections. Measured in mm. Provides an absolute error measure, not normalized to the size of the chessboard. Therefore, a 1 mm RMSE diagonal for a large board is a smaller percentage error than a 1 mm RMSE diagonal for a small board. Not affected by the number or size of the chessboard squares.
RMSE Angle: The RMSE error of the angle of the 4 outer corners of the chessboard relative to their known angle of 90 degrees, for all triangulated chessboard detections. Measured in degrees. Since this is an error relative to 90 degrees for all chessboards regardless of size, a 1 degree RMSE angle has the same meaning for all sizes of chessboard. Not affected by the number or size of the chessboard squares.
Origin Triangulation Frame: The video frame used to initialize the position and orientation of the global coordinate system.
After the camera calibration is complete, the calibration trial videos can be reviewed for feedback. The following visual cues projected onto the camera views can be useful in determining which portions of the trial contributed to the calibration, and those that did not. This can be useful for optimizing your calibration trial technique.
Frames in which the chessboard has been successfully detected in 3 or more cameras and has thus been used to calibrate those cameras will have a green Z-shaped pattern across the face of the chessboard.
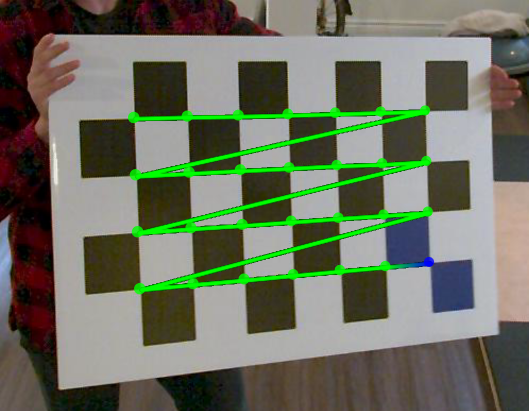
Green Z-pattern projected onto the chessboard for frames which were used in the calibration.
Frames in which the chessboard has been successfully detected in fewer than 3 cameras and therefore was not used to calibrate the cameras in which it was detected will have a red Z-shaped pattern across the face of the chessboard.
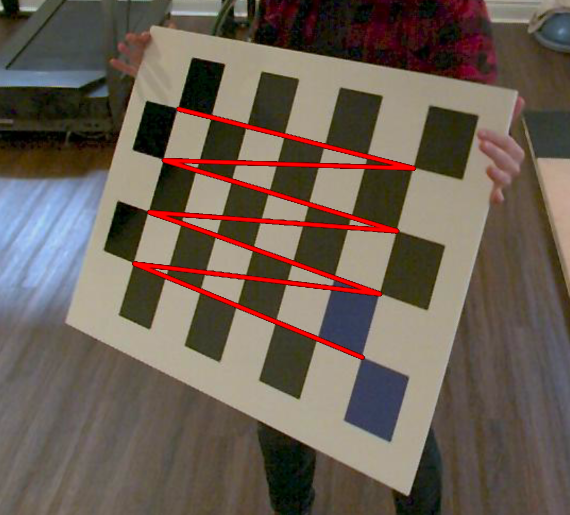
Red Z-pattern projected onto the chessboard for frames in which the chessboard was detected but not used in the calibration.
The 3D position of the chessboard square intersections for frames that were used in the calibration are projected onto every camera view, including those that cannot see the front face of the chessboard.
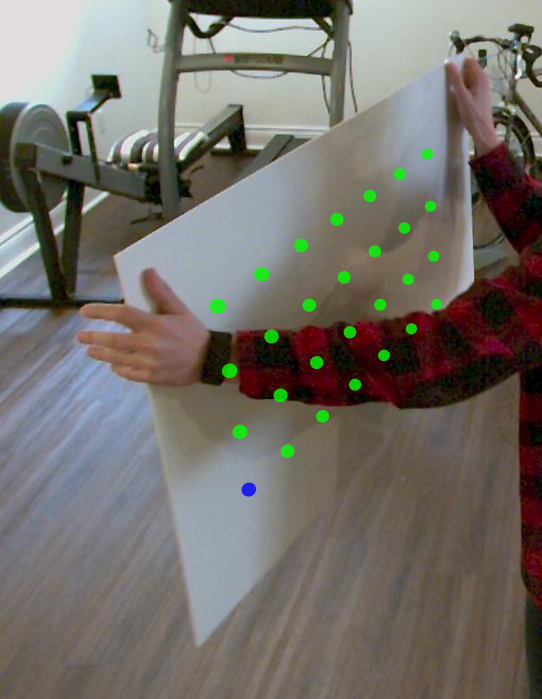
Green dots projected onto all camera views showing the reconstructed 3D positions of the chessboard square intersections.
9.4. Object Calibration
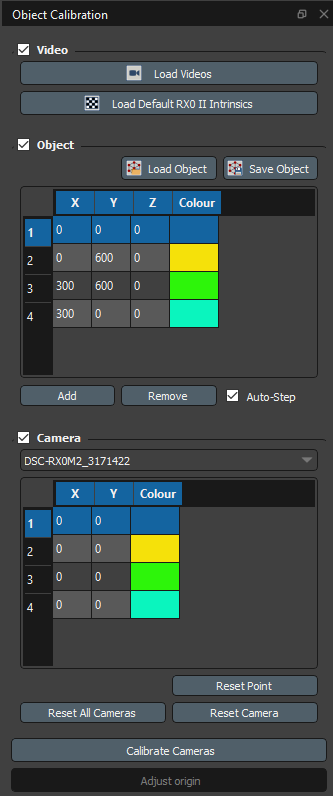
The object calibration dialog is used to calibrate extrinsic camera parameters (camera position and orientation).
Load Videos: Load video files (.mp4 or .avi) containing the extrinsic calibration object. To load the videos, browse to and select the folder containing the videos. The structure of this folder must conform to the format described in Video Data.
Load Default RX0 II Intrinsics: Load default lens calibration parameters for Sony RX0 II cameras and apply them to all cameras. This can be used to avoid performing a lens calibration when using the RX0 II cameras. Loading default intrinsics overwrites any existing lens calibration parameters. Note: These parameters are only valid for Sony RX0 II cameras with standard lenses. For any other cameras or lenses these default parameters are invalid.
The following items are only accessible after extrinsic calibration videos have been loaded and a lens calibration has been performed or loaded.
- Object
Load Object: Load a .txt file defining the calibration object. Each line of the file contains comma-separated x-y-z coordinates of one of the key points on the object in mm. To load the object, browse to and select the object file.
Save Object: Save the current object definition. To save the object, browse to the desired save location and enter the desired filename.
Object Definition: The x-y-z coordinates of the key points on the object in mm. Points can be added to or removed from the definition using the Add and Remove buttons. The coordinates of the points can be changed by editing corresponding fields.
Auto-Step: If checked, the selected object point will advance each time a point is identified in one of the 2D views.
- Camera
Cam ID: The ID of the camera corresponding to the current 2D view. Use the drop-down to select a different 2D view. Maximizing a view will automatically select it.
Camera Points: The pixel coordinates of each of the object points in the current view. The coordinates of the selected camera point can be set by ctrl-clicking on the point in the 2D view. Alternatively, the coordinates can be set by editing the corresponding field. The color of each camera point is the same as the color of the corresponding object point. Each camera point is drawn as an ‘x’ in the 2D views with the selected point drawn larger.
Fine Tune: If checked, the position of the selected camera point can be adjusted pixel-by-pixel using the arrow keys while holding ctrl+shift.
Reset Point: Remove the currently selected point from the current view.
Reset Camera: Remove all points from the current view.
Reset All Cameras: Remove all points from all views.
Calibrate Cameras: Perform the extrinsic calibration for all of the cameras. After performing the calibration, the position of any camera points that were not identified before the calibration are calculated and drawn in the 2D views as an ‘*’.
Adjust Origin: When using the checkerboard extrinsic calibration, sometimes the origin may appear at an undefined location because the board was not recognized in the origin frame. This feature allows you to adjust the reference frame by clicking on an object (typically four squares on the checkerboard). Since the frame is just being adjusted (not computed), a calibration needs to be loaded to use this feature, and the relative pose of the cameras will be unchanged. Note: To adjust the origin, you need to manually identify the object points for three cameras only.