4. Interface Reference
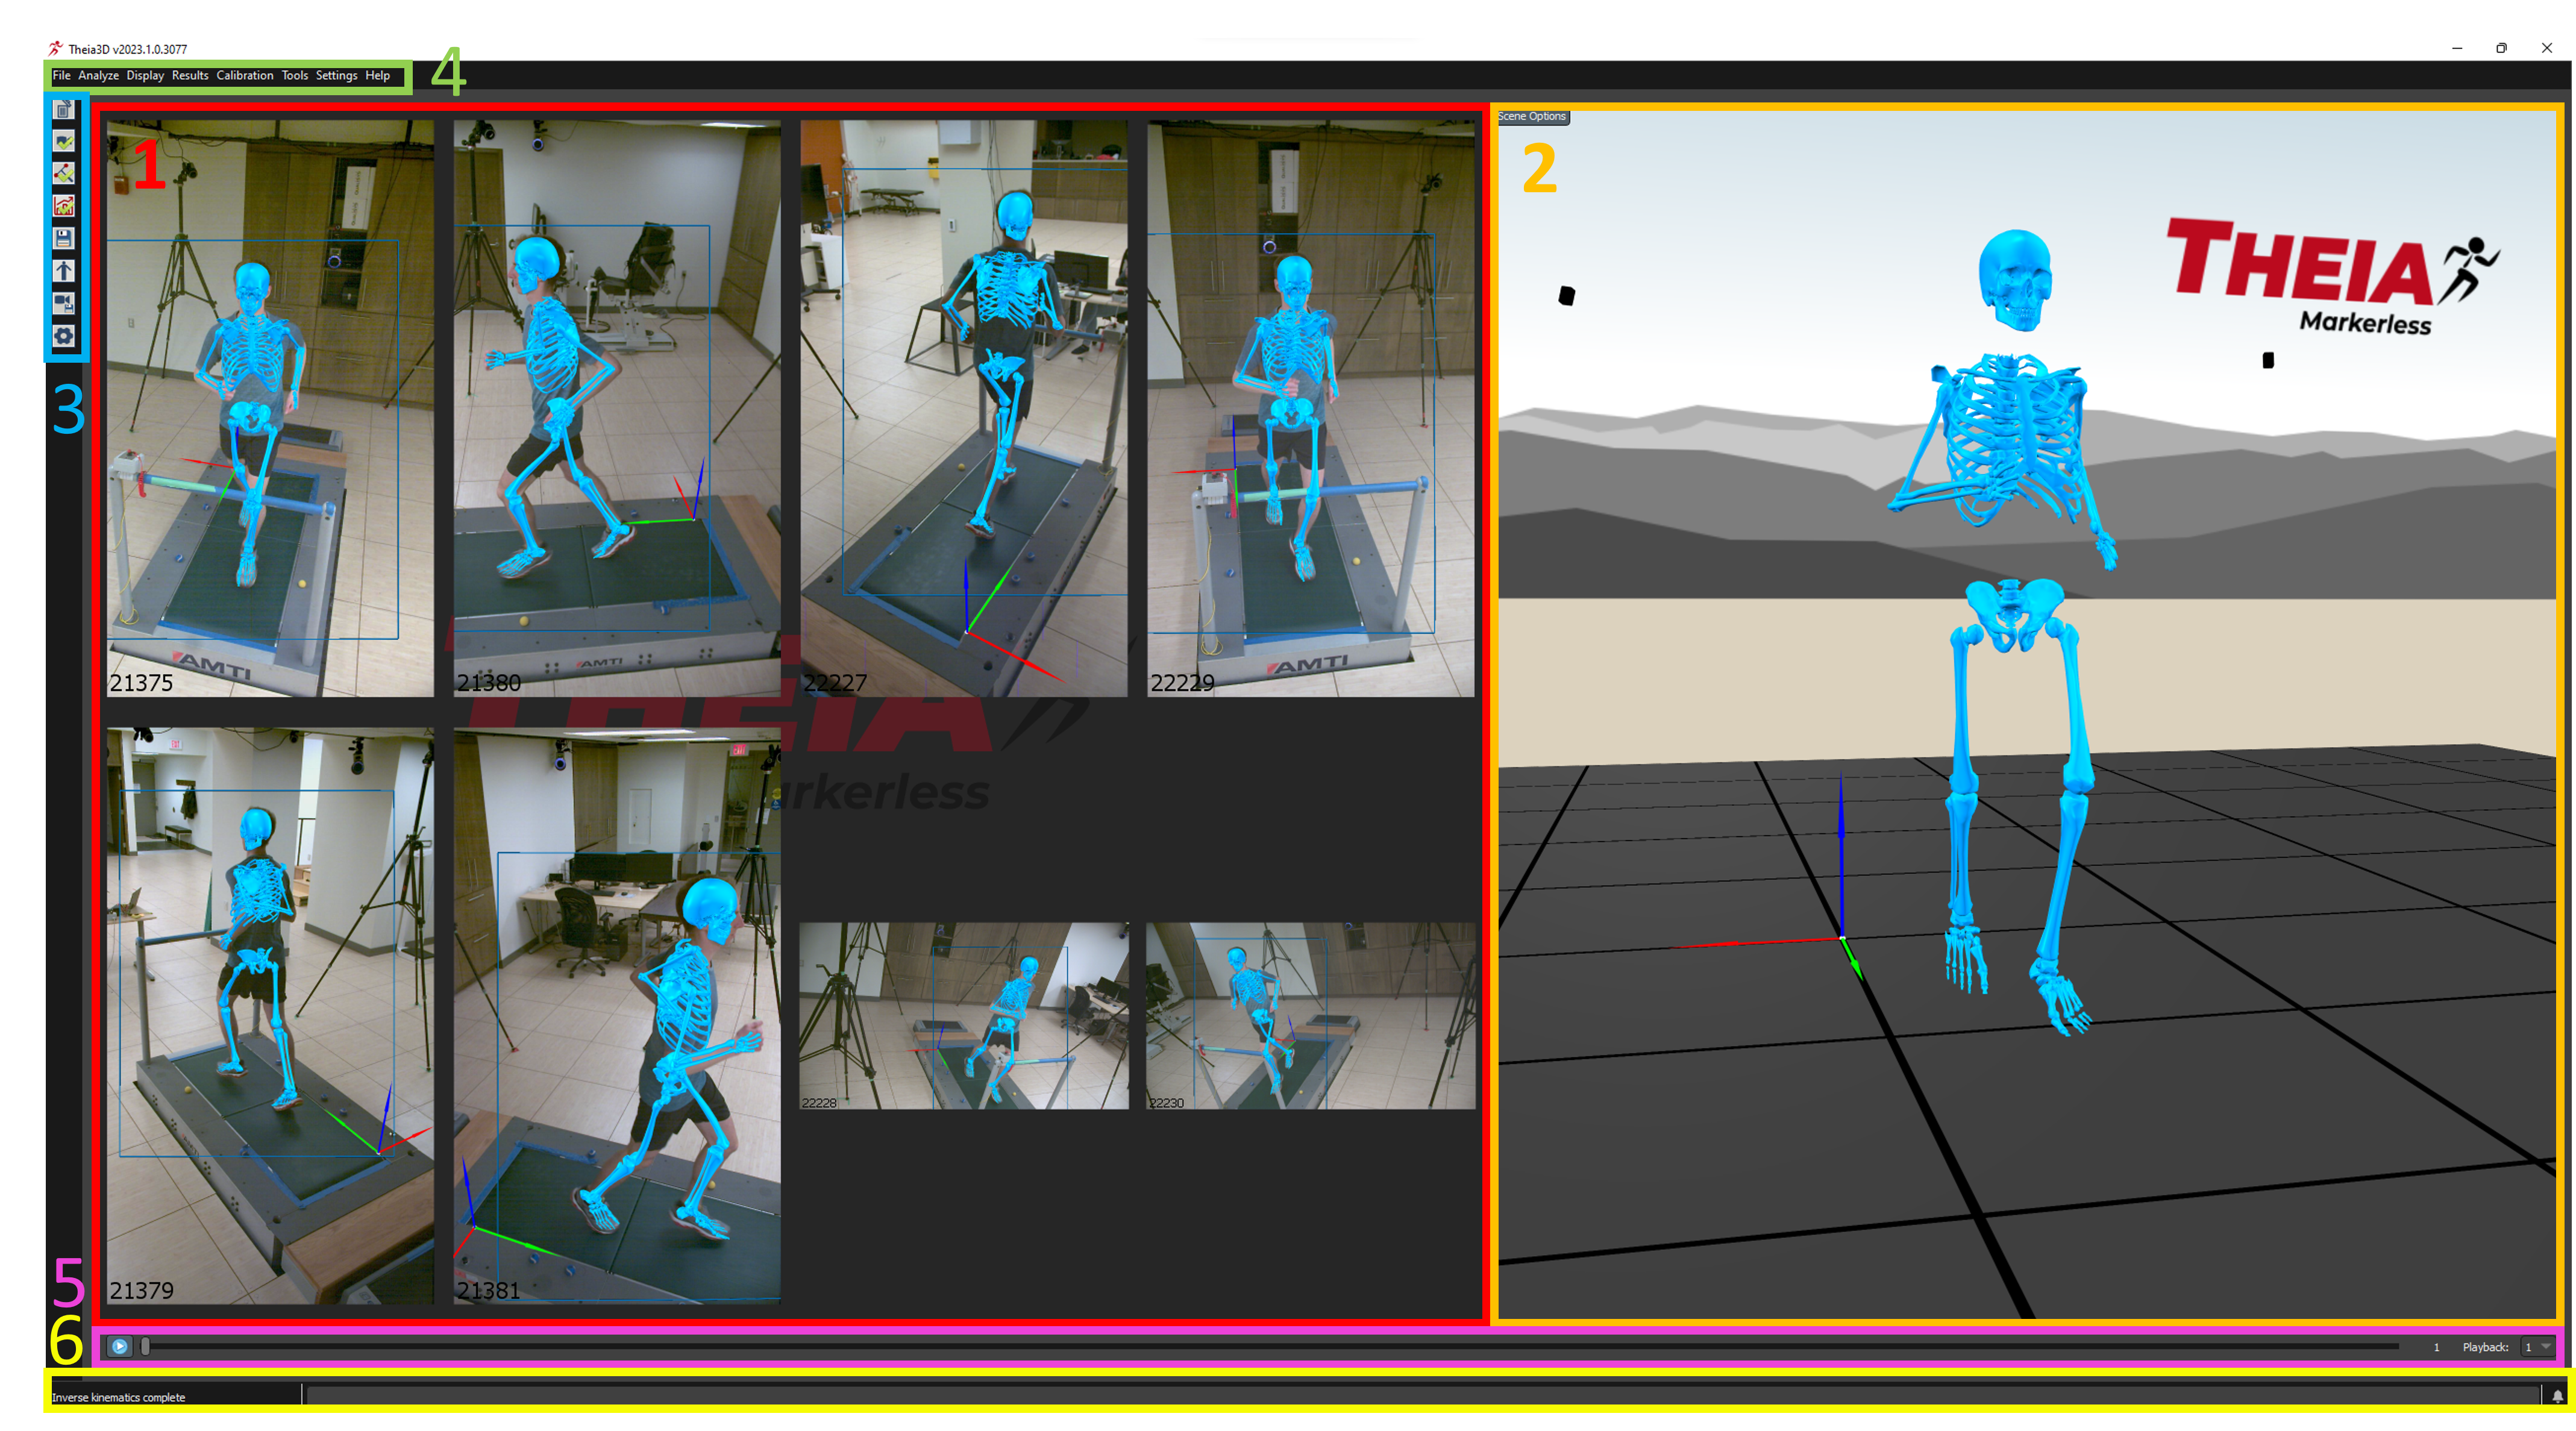
Theia3D application interface.
1. 2D Views
The videos from each camera view are shown here and the 3D scene is projected onto each view. When all views cannot fit in the available area, arrows are shown and can be used to move through the available views. Double-click on a view to maximize it. When maximized, the mouse is used to zoom (scroll) and pan (right-click and drag) the view, and clicking on the arrows moves between views. Double-click the maximized view to restore it and show all views. Use Alt + right-click to inspect a view through a magnifying class - the level of magnification is controlled by the mouse wheel and reset with the ‘R’ key.
2. 3D View
The 3D scene is rendered here. The mouse is used to rotate (left-click and drag), pan (right-click and drag), zoom (scroll), and inspect (Alt + right-click) the scene. The 3D scene contains the global coordinate system, cameras, and skeletons of each identified and tracked person. The origin of the global coordinate system is a white sphere, the x-axis is a red arrow, the y-axis is a green arrow, and the z-axis is a blue arrow. The scene enviroment, ground, and lighting can be modified using the menu accessed using the button at the top left of the view.
3. Quick Tools
The quick tools are shortcuts to the most common Theia3D commands. The entire processing pipeline can be executed using these shortcuts.


4. Menu
The menu is divided into eight sections.
File - Commands to load and save data. See File Menu for descriptions of these commands.
Analyze - Commands to process data. See Analyze Menu for descriptions of these commands.
Display - Options to control what is displayed in the video overlays and 3D scene. See Display Menu for descriptions of these options.
Results - Options to display joint angle results or monitor the progress of a batch analysis. See Results Menu for descriptions of these options.
Calibration - Commands to check or process calibrations. See Calibration Menu for descriptions of these commands.
Tools - Commands to enhance, organize, and modify data. See Tools Menu for descriptions of these commands.
Settings - Access Theia3D preferences dialog. See Settings Menu for descriptions of the settings options.
Help - Access help and program information. See Help Menu for descriptions of these dialogs.
5. Playback Controller
The video data can be played and paused using the play button on the left, or you can scroll through the trial using the timeline slider. The number to the right of the timeline indicates the current frame number, and the playback dropdown allows you to adjust the steps between frames that are displayed. When set to one, every frame is displayed, when set to two, every other frame is displayed, and so on.
6. Status Bar
Below the playback timeline controller is a status bar which indicates the current status and any ongoing processes.